Next to chastity I have another quite recent weakness: Milking Machines. Isn’t it just great to teach a sub that they must not cum for most of the time. But when they are allowed to, they should be made to cum as often as possible by a machine?
So to cut a long story short, I wanted a suction-based milking machine like the SeriousKit one, but without the price tag. So pawsy pup got going and built one.
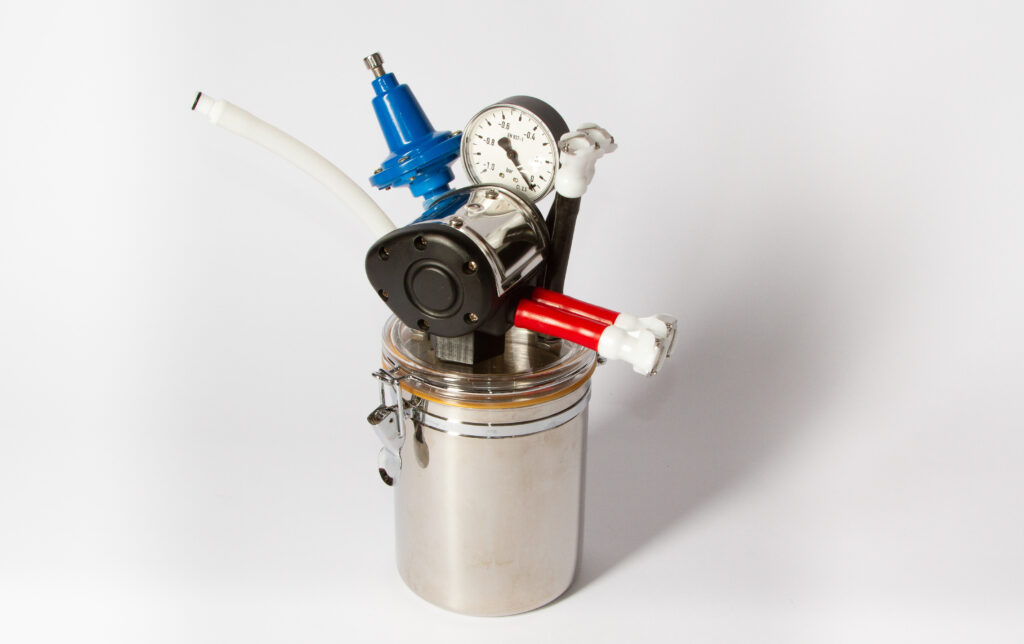 It’s a very compact version of a standard milking machine as SeriousKit or GenerationF sell. Overall it comes at around 200€ and a time investment of an afternoon. It consists of all the key parts like a pressure regulator, a gauge and the pulsator mounted on an airtight coffee can. Hence the name “coffee milker”.
Parts
Here’s a parts list and the sources I used. Of course you may need to swap a few depending on your location or availability.
- 1 Coffee can You may use any airtight container that has a (mostly) flat lid which you can drill holes into.
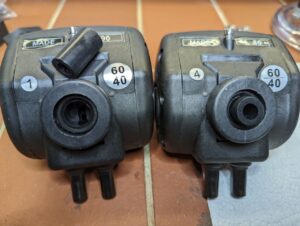
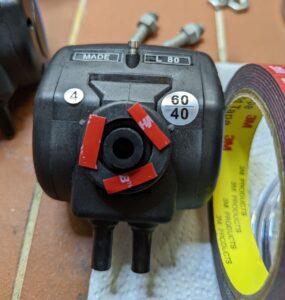
- 1 Pulsator This is the key part. There are tons of cheap options. I tried a few different ones and did not notice any significant differences.
- 1 Pressure regulator Depending on your vacuum pump, you will want this.It allows you to reduce the suction to a level that is comfortable. You may be fine without one, but I painfully regretted not having one in the beginning 🙈.
- 1 Vacuum gauge Same as for the regulator. You don’t strictly need one, but it’s helpful. Especially when you use the milker on someone else.
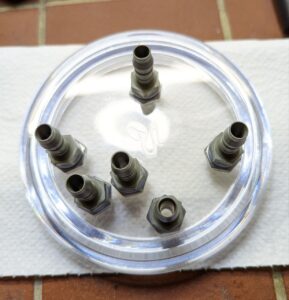
- 6 Hose fittings
- 6 10mm O-Rings
- 6 M10 Nuts, fine threaded with 1mm pitch
- 8mm silicone hose you will need a few short pieces for the actual milker plus some longer pieces to connect to the receiver and pump. I used different colors for the different types of connections.
- 1 PLC male hose coupling without valve
- 4 PLC female hose couplings with valve
- 3D-printed support for the pulsator
Build
The build is pretty straight-forward.
Lid
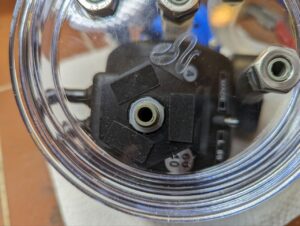
You need to drill 10mm holes into the lid and mount the hose fittings into it. The trickiest part is arranging the holes in a way such that you can fit everything on it without too much bend. Here’s the arrangement I used.
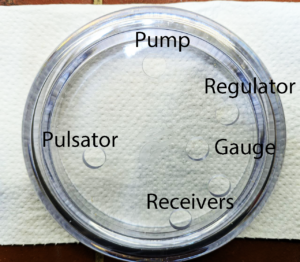
The arrangement needs to consider that the Pulsator needs to sit flat on the lid and you’ll need to be able to access the back to adjust the speed as well as have enough clearance at the front, where the hoses to the connectors stick out.
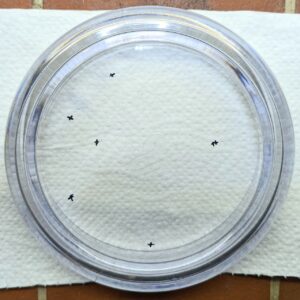
Use the O-Rings to create a good seal around the couplings. Fit an O-Ring around the fitting, push the fitting through the hole and fix it with the nut from insider the lid. Contrary to the picture shown on the left, don’t mount the one for the pulsator quite yet.
Pulsator
Next is preparing the pulsator assembly. This takes advantage of the thickness of the hose. The outer diameter fits just into the O-Ring inside the pulsator. Prepare a 25mm long piece of the hose. I used a sharp kitchen knife to get a very clean and flat cut. Put the hose into the pulsator as far as you can.
Next you stick the support for the pulsator to the bottom. I used three strips of 3M’s 5952 VHB tape.
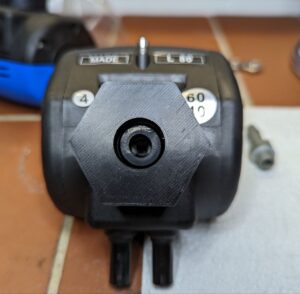
Once you did that, push the hose fitting into the tube. The length of the tube should be so long that the bottom of the hose fitting is aligned with the bottom of the pulsator support. The O-Ring you put around the fitting should be slightly higher than the base of the support.
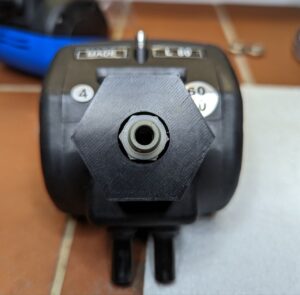
Last you put three more strips of double sided tape to the support and stick the pulsator assembly to the lid. Make sure you align it such that it does not collide with the tubes sticking out. Carefully fix the fitting with a nut. You need to do that carefully to create a tight seal with the O-Ring but without turning the fitting which is only held by the tube.
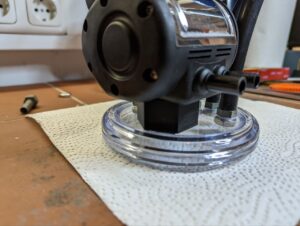
Last, put all the hoses and connectors to the lid and double check that you have a tight seal. Mount the lid on the can again and also check the tight fit there.
Voila, you built your very own coffee milker.

Next you should test whether everything is air tight by connecting your vacuum pump. Depending on the setting of the regulator you should easily get to -0,7 bar.
Part 2 is about building the hoses, the pump and some other parts you’ll need.